Choosing an Anti Flammable Cabinet is a practical safety decision, not a styling choice. The right cabinet should match the liquids stored, the amount on hand, and the conditions in the room. A mismatch can be easy to overlook: a cabinet may look sturdy while lacking suitable construction, capacity, or clear operating instructions. Small details matter. Check the label, inspect the door and latch, and consider how staff will access the cabinet during a busy shift.
This guide covers seven useful selection points, including construction, capacity, ventilation needs, placement, labeling, and routine inspection. Compare product documentation rather than relying on a bright finish or a confident sales description. Confirm that the cabinet’s stated features suit your workplace and the materials you intend to store. Then think about daily use: Can the door close fully? Are containers easy to identify? Is the area around the cabinet kept clear? These questions are not glamorous. They are useful.
A named expert quotation should be verified against a reliable source, and none was provided for this request. To avoid inventing an attribution, here is an original guiding principle for this article, not a quotation: “A cabinet protects best when its specifications and everyday use match the hazard.” Keep that in mind as you compare options. No single feature tells the whole story. A careful choice, followed by consistent inspection, can make storage safer and more dependable.
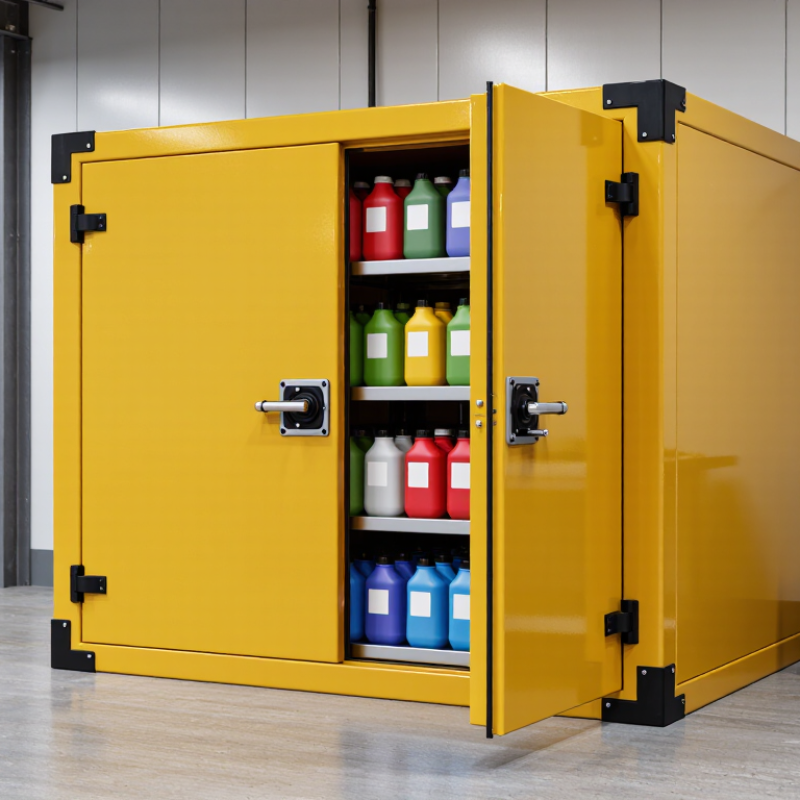
Before selecting a cabinet, list each liquid by product name, quantity, container size, and task. Read the Safety Data Sheet (SDS), especially Sections 7, 9, and 10: handling and storage, physical properties, and stability/reactivity. Flash point and incompatibilities matter. A solvent and an oxidizer should not share a cabinet just because both arrive in small bottles. Read the SDS.
OSHA’s 29 CFR 1910.106(d)(3)(i) gives useful capacity benchmarks for U.S. workplaces: a cabinet may hold up to 60 gallons of Category 1, 2, or 3 flammable liquids, or 120 gallons of Category 4 liquids. These are limits, not recommended fill targets. Check applicable local rules and the cabinet’s rated capacity. Leave room to remove containers safely; crowded shelves can turn routine handling into a spill risk.
Match construction and layout to actual use. Check shelf load ratings, sump capacity, door clearance, and whether containers fit upright without touching the door. NFPA 30 provides a recognized framework for flammable and combustible liquid storage; use its current edition alongside SDS guidance. Venting is not automatically safer. Follow the cabinet instructions and site fire-safety plan. Inventories change. Recheck them after process changes, and question assumptions based on old labels alone.

A cabinet’s fire-resistance rating is useful only when you understand what it measures. Check the test standard named on the cabinet label and request its supporting documentation. For example, EN 14470-1 covers safety storage cabinets for flammable liquids in certain markets. Requirements and accepted standards can differ by location, so confirm what applies to your workplace.
Labels can mislead. A rating usually describes performance under a defined test, not guaranteed protection in every fire. Match the cabinet’s rating to the stored liquids, quantities, room conditions, and your site’s risk assessment. Check that the doors, vents, and construction match the tested configuration. A modified cabinet may not perform as its rating suggests. I used to think a higher number settled the choice; that was too simple. Ask the supplier what the rating means, then compare the answer with the product’s test documents and your safety guidance. If the paperwork is vague, pause and verify before buying.
Choosing cabinet capacity starts with a count, not a guess. List every container, its volume, and its footprint. A five-gallon can may fit on paper but block the shelf above. Measure the tallest container, including its spout, and leave room to remove it safely. Capacity matters.
Check the cabinet’s stated liquid capacity and shelf load rating separately. They measure different things. NFPA 30, the Flammable and Combustible Liquids Code, sets a U.S. benchmark: a cabinet may hold up to 60 gallons of Category 1, 2, or 3 liquids, or 120 gallons of Category 4 liquids. OSHA’s 29 CFR 1910.106 gives the same limits. Local requirements and liquid classifications can differ, so confirm which rules apply to your workplace.
A cabinet filled to its rated limit can become awkward to use. Leave space for labels to remain visible and containers to come out without tipping. Consider the busiest shift, not just today’s inventory. A small reserve can help, though buying far more capacity than needed may waste floor space. Recheck your measurements before ordering. It is an easy detail to overlook.
| Tip | What to Check | Illustrative Capacity | Typical Exterior Footprint (W × D × H) | Sizing Guidance |
|---|---|---|---|---|
| 1. Count the containers you need to store | List each container’s capacity and count, including partially used containers that will remain in storage. | Example: 12 containers × 1 gal = 12 gal of container capacity | Varies by cabinet design | Base your estimate on the containers’ labeled capacities, not just the amount of liquid currently inside them. |
| 2. Choose a capacity above your current total | Allow room for expected additions and for containers to be placed and removed without excessive handling. | For a 12 gal inventory, compare cabinets in the 16–30 gal nominal range | Small cabinets commonly have a compact footprint; check the product’s actual dimensions | A practical allowance is a planning aid, not a regulatory storage limit. Select a size that fits both present and foreseeable inventory. |
| 3. Match cabinet capacity to container size | Check shelf clearance, door opening, shelf load rating, and whether containers fit upright. | 12 gal, 30 gal, or 45 gal nominal capacity | Approx. 23–43 in W × 18–34 in D × 35–65 in H | These are illustrative size ranges only. Actual exterior and interior dimensions differ by construction and model. |
| 4. Measure the available floor space | Measure the installation area, including the route for moving the cabinet into place and access to its doors. | 45–90 gal cabinets may need a wider or deeper footprint | Approx. 34–43 in W × 34 in D × 65 in H | Compare exterior dimensions with the available space, and keep required exits, aisles, and equipment access unobstructed. |
| 5. Consider a vertical cabinet when floor space is limited | Check overall height, shelf spacing, and whether frequently used containers can be reached safely. | Common options include 30–45 gal nominal capacity | Approx. 43 in W × 18 in D × 44–65 in H | A tall, shallow cabinet can reduce floor-space use, but confirm that its shelves accommodate the height and weight of your containers. |
| 6. Plan for larger or heavier containers | Verify door clearance, shelf capacity, and the cabinet’s internal dimensions for drums or bulky containers. | 60–90 gal nominal capacity may suit larger storage needs | Approx. 34–43 in W × 34 in D × 65 in H | Do not assume a cabinet’s total capacity guarantees that a particular drum will fit. Check container dimensions and shelf ratings. |
| 7. Verify the permitted quantity before buying | Check applicable fire, building, and workplace requirements, as well as the cabinet’s listing and instructions. | Choose capacity only after confirming applicable limits | Confirm the exact product dimensions before installation | Cabinet capacity is not the same as the quantity permitted in a storage area. Requirements vary with jurisdiction, liquid classification, and use. |
Note: Capacities and dimensions shown are illustrative planning examples, not specifications for a particular cabinet. Always confirm the manufacturer’s published measurements, usable interior space, shelf ratings, and applicable local requirements before purchase.
Tip 1: Compare cabinet construction, not just exterior appearance. Check the manufacturer’s stated fire-resistance rating, wall design, door seams, and corrosion-resistant finish. A thicker wall sounds reassuring, but thickness alone does not prove better protection. Match the cabinet’s materials to the substances you plan to store, and verify that its documented rating suits your workplace requirements. Small details matter.
Tip 2: Open and close the doors before choosing a model. Self-closing doors can reduce the chance of a cabinet being left open, but they should move freely and latch securely. Check hinge strength, handle operation, and whether the doors stay open when needed for loading. A narrow doorway or crowded aisle can make a good cabinet awkward to use.
Tip 3: Compare safety features as a complete set. Look for clear hazard labels, a raised leak-catching sump, and secure latching. Confirm whether vents are intended to remain closed or connect to approved equipment; do not modify them based on guesswork. Check the instructions and applicable fire-safety requirements. I would also measure the containers and shelf spacing, since a cabinet that technically fits may still be frustrating to load and inspect.
Cabinet placement is part of safe storage, not an afterthought. Choose a stable, level spot near the work area, but away from heat sources, direct sunlight, and routes people need for escape. Keep access clear, and do not obstruct sprinklers or other fire-protection equipment. Follow the cabinet instructions and applicable site requirements; the right separation distance depends on the room and stored materials. NFPA’s report “Fires in Industrial and Manufacturing Properties” estimated an annual average of 37,910 such fires in the United States from 2011 to 2015. The report recorded 16 civilian deaths, 273 injuries, and $1.2 billion in direct property damage each year. Those figures cover many fire causes, not cabinets alone, but they underline why storage conditions deserve attention.
Set a recurring inspection schedule based on the site’s risk and operating routine. A weekly visual check can catch open doors, blocked access, spills, or damaged labels; document findings and follow up on repairs. Check that doors close and latch properly, containers are sealed, and the cabinet’s interior shows no corrosion or residue. Keep incompatible materials apart according to safety guidance. Small details matter. A cabinet can look tidy while a hinge is failing, so include the door and latch in every check. The schedule may need revision when storage volume or room layout changes.