How to Choose the Right Ultrasonic Disperser

Choosing the right Ultrasonic Disperser starts with the material, not the largest power rating on a product page. A water-like liquid and a thick pigment paste place very different demands on the same equipment. Batch size matters, too: a probe suited to a small beaker may not process a larger vessel evenly. Small details matter.

This guide explains how to compare processing volume, viscosity, probe size, power, and temperature control. It also considers practical questions: Can the instrument run for the required time? Is the probe easy to clean or replace? Will the vessel fit securely beneath it? These details affect daily use as much as headline specifications do. A neat specification sheet can still mislead; real samples behave less neatly. Testing a representative sample, when possible, can reveal heating, foaming, or uneven dispersion that a brochure cannot show. The right choice depends on the target particle size, formulation, workflow, and budget—not one specification alone. Use manufacturer guidance for operating limits, and leave room for adjustments after initial trials. A careful comparison helps narrow the options without promising that one machine will suit every material.
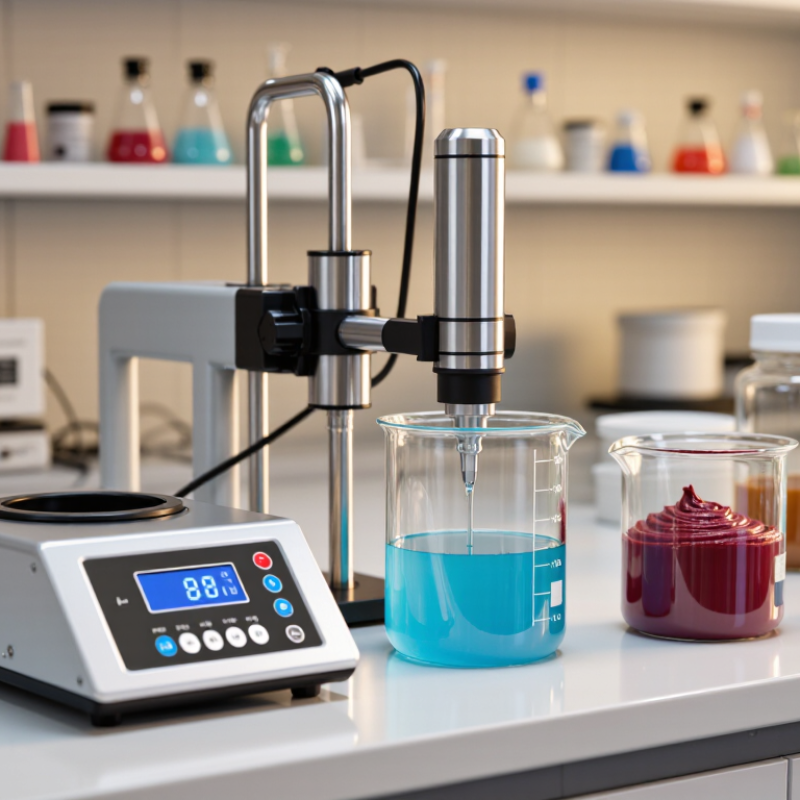
How to Choose the Right Ultrasonic Disperser

Identify the Material and Intended Dispersion Outcome

Start by identifying what the material is and what “dispersed” should mean for your process. A pigment may need even color and fewer visible specks. A ceramic slurry may need stable particles that do not settle quickly. For samples with fragile structures, preserving particle shape can matter more than reaching the smallest possible size. Record the starting particle size, solids concentration, viscosity, and temperature. Then define a measurable endpoint, such as particle-size distribution or settling rate. “Looks smooth” is not enough.

Material properties help guide equipment choice, but they do not predict the result on their own. NIST’s certificate for SRM 1898 titanium dioxide reports a specific surface area of 52.0 ± 2.0 m²/g. This reference value describes the test material, not a required disperser setting. It does show why surface area and particle characteristics matter when comparing samples. Before a full run, test a small batch and check for heating, foaming, or particle damage. I would not assume that more energy always improves dispersion; that can be an expensive mistake.

Tips: Write down the intended outcome before selecting a probe or setting. Keep sample volume, vessel shape, and temperature consistent between tests. Compare results using the same measurement method, such as laser diffraction under ISO 13320 guidance. If the outcome is unclear, refine the target before increasing processing time.

How to Choose the Right Ultrasonic Disperser - Identify the Material and Intended Dispersion Outcome

Material or Sample Common Processing Challenge Intended Dispersion Outcome Practical Starting Approach What to Check During Trials
Oil and water phases Droplets may merge after mixing, especially without suitable formulation. Create a finer, more uniform emulsion and reduce visible droplet size. Process the liquid mixture with any required surfactant or emulsifier. Use short trials and control temperature. Droplet-size distribution, separation over time, temperature, and whether the formulation needs additional stabilization.
Pigments in a liquid carrier Pigment agglomerates can cause uneven color, poor gloss, or settling. Break down agglomerates and distribute pigment more evenly through the liquid. Pre-wet the pigment where appropriate, then process the slurry using a probe suited to the batch volume and vessel. Color uniformity, particle or agglomerate size, viscosity, temperature, and possible probe wear or contamination.
Nanoparticle suspensions Fine particles can form persistent agglomerates and may reagglomerate after processing. Reduce agglomeration and obtain a more uniform suspension. Use controlled, incremental processing with effective cooling. Select the liquid medium and stabilizer for the particle system. Particle-size distribution, stability over time, temperature, and any contamination from probe erosion.
Biological cells or soft tissue in suspension Cells may need disruption, while excess heat or processing can damage temperature-sensitive components. Lyse cells or release intracellular material while limiting unwanted heating. Use pulsed operation and cooling as needed; process small test samples before scaling up. Lysis efficiency, sample temperature, recovery of the desired material, and preservation of heat-sensitive compounds.
Viscous polymers, resins, or concentrated liquids High viscosity can hinder circulation and reduce effective energy transfer through the sample. Improve mixing or distribute an added component more uniformly. Confirm that the disperser is suitable for the sample’s viscosity. Consider pre-mixing or dilution if compatible with the process. Flow around the probe, uniformity throughout the vessel, temperature, and whether the sample remains processable.
Mineral or abrasive suspensions Dense particles can settle; abrasive solids can wear a probe over time. Break up soft agglomerates and distribute solids more evenly. Keep solids suspended with appropriate vessel mixing and use brief trials to assess probe wear and sample compatibility. Settling rate, particle distribution, probe condition, and potential metal contamination.
Fibers or delicate particles Strong cavitation can shorten, fragment, or otherwise alter fragile structures. Distribute material while retaining as much of its original structure as possible. Begin with gentle, short processing trials and compare the sample before and after treatment. Fiber length or particle shape, uniformity, and any loss of the properties the process is intended to preserve.

Selection tip: Match the disperser to the sample’s volume, viscosity, solids content, and required outcome. Processing time and settings are sample-dependent; validate dispersion quality, temperature, and stability at the intended scale before routine use.


Estimate Batch Size, Viscosity, and Processing Requirements

When choosing an ultrasonic disperser, size the batch around the volume you will actually process, not the vessel’s full capacity. A 500 mL beaker with 100 mL of liquid can behave very differently from a filled tank. Keep the probe immersed, but away from the vessel wall and base. Small batches behave differently. Check whether the equipment can handle your smallest and largest planned volumes, and whether several short runs are acceptable.

Viscosity needs a measurement, not a guess. The IAPWS 2008 formulation reports water’s dynamic viscosity at 20°C as about 1.002 mPa·s; thick or shear-thinning mixtures can demand much more energy. Record viscosity at the process temperature, and note whether it changes under shear. ISO 3219-2:2021 provides guidance on rotational and oscillatory rheometry, which helps make those measurements comparable. I still check twice. Then match the disperser to the required processing time, particle-size target, and heat sensitivity. A small trial can reveal foaming, warming, or uneven circulation before a larger batch is run. Record the probe position and amplitude too; otherwise, a successful result may be hard to reproduce.

Compare Disperser Power, Frequency, and Probe Design

Choosing an ultrasonic disperser starts with the material, not the largest power rating. Power affects how much energy enters a sample and how quickly it heats. A viscous slurry may need more energy than a thin liquid, but excess power can warm a small vial before dispersion improves. Watch the temperature. A simple ice bath can help, though it may not solve every heating problem.

Frequency influences cavitation, the formation and collapse of tiny bubbles in liquid. Many laboratory dispersers operate near 20 kHz, but frequency alone does not predict performance. Sample volume, viscosity, and vessel shape also matter. Compare units using the same material and similar conditions when possible. Keep a record of amplitude, processing time, and temperature. Small differences can change the result.

Probe design determines how energy reaches the sample. A larger-diameter probe can treat a broader volume, while a narrow probe may suit small tubes or localized processing. Keep the tip submerged without letting it touch the vessel wall or bottom. That contact can cause noise, wear, or inconsistent results. Check the probe material and dimensions against your sample and vessel. It is easy to focus on specifications and overlook setup; even careful comparisons leave some uncertainty until tested on the actual mixture.

Check Control Features, Compatibility, and Safety Measures

How to Choose the Right Ultrasonic Disperser

Check Control Features, Compatibility, and Safety Measures

Control features should match the work, not just look impressive on a panel. Adjustable amplitude helps manage energy input, while pulse mode can limit heat buildup during longer runs. A timer makes repeated batches easier to compare. Small details matter. Note the settings used, sample volume, and processing time; otherwise, a “better” result may be hard to reproduce. The displayed setting does not always show how much energy reaches the sample, so check the equipment manual and validate settings with your material.

Compatibility affects both results and equipment life. Check whether the probe material and diameter suit your sample, vessel, and required processing volume. A probe that is too large may not fit safely; one that is too small may process the sample unevenly. Leave enough space around the probe tip, and avoid letting it touch the vessel walls or bottom. Heat builds quickly. Use temperature monitoring or short processing intervals for heat-sensitive materials. I would not assume a cold-looking vessel means the sample stayed cool.

Safety measures deserve a close look before operation. A secure probe connection, splash guard, and suitable sound enclosure can reduce common exposure risks. Wear appropriate eye and hearing protection, and keep hands clear while the unit is running. Follow the manufacturer’s instructions for cleaning and inspection. It is easy to rush setup, but a loose fitting or cracked probe is not a minor detail.

How to Choose the Right Ultrasonic Disperser — Check Control Features, Compatibility, and Safety Measures

Typical nominal frequency options (kHz)

Ultrasonic processing equipment is commonly offered at nominal frequencies such as 20, 25, 30, and 40 kHz; availability varies by design. Treat frequency as one comparison point, not a stand-alone measure of performance. Check whether the unit’s controls suit your process, its probe and vessel fit your sample volume and material, and its safety features include appropriate shielding and protection against overheating.

Assess Maintenance Needs, Support, and Total Operating Cost

An ultrasonic disperser’s purchase price is only one part of its cost. Before choosing a unit, list the maintenance tasks required during a normal operating week. These may include cleaning the probe, checking fittings, inspecting seals, and recording operating hours. Small items matter. A worn probe or damaged seal can affect dispersion quality and interrupt production. Track replacement intervals and labor time, not just parts prices. A simple log can reveal whether maintenance is predictable or repeatedly disruptive.

Ask what support is available after installation. Can technicians help diagnose inconsistent results remotely, or is equipment shipment required? Check service hours, training options, spare-part availability, and typical response times. For a small lab, a day of downtime may delay a test schedule. For a production line, it can affect an entire batch. Support is not always easy to compare; get specific details in writing.

Estimate total operating cost over the period you expect to use the disperser. Include electricity, maintenance labor, replacement probes, training, and possible downtime. Also consider whether the unit fits your workload: an oversized system may use more energy, while an undersized one may need longer runs. Forecasts are imperfect. We often overlook cleaning time. Leave room for that uncertainty, then compare costs using the same workload and time period for each option.

Article Source: